About Me ☆

Hello, I am Sami, the Girl behind Guilty Pleasures. I have been
writing tutorials since May 22, 2009. My first tutorial was called Twilight Obsession. How I got my name is simple. I found tagging to be my Guilty Pleasure. I thought it fit perfectly. I am a designer as well. You can find links to my blogs on my top menu. If you have questions please feel free to ask. Other wise you can read more about me on my
ABOUT ME PAGE!
My Blogs☆

Store Manager ☆

CT Manager☆


Favorite Blogs ☆


My Hangouts☆


Friday, February 26, 2010
Peas in a Pod
Another Tut using the 2 Peas in the Pod Kit
and the kit is exclusive to Scrappin' Bratz.
Artwork by Jasmine Beckett-Griffith.
Purchase at CILM .

This tutorial was written on 26 February 2010 by Samantha.
This is from my own creativity any similarities is completely coincidental.
Create new raster layer 600x600
you can flood fill white if you prefer. Open paper of choice
I am using GCZ_paper9
Copy and paste as new layer
Open SKD-Mat1
Go to layer/ New Layer mask
From Image
Select SKD_Mat1 from the list
Merge mask group
resize that by 85%
Open yout tube
copy and paste as new layer
She should be centered
open SKD_Frame4
copy and paste as new layer
Resize by 50%
Move top left slightly
Open SKD_Wordart
Copy and paste as new layer
resize by 40% Move to the
top of your frame
Open SKD_Leaf2
Copy and paste as new layer
resize by 80 %
Move below your tube layer
and Duplicate
Your tube should look like she
is sitting on the leaves
Open GCZ_flower1
Copy and paste as new layer
resize by 50%
Move below your tube above the leaves
duplicate and Mirror
Open SKD_Heart1
Copy and paste as new layer
resize by 50%
Free Rotate to the right by 25
See mine for placement
Add your name and copyright and save
2 Peas
I have the pleasue of being CT for
and the kit is exclusive to Scrappin' Bratz.
NO OUTSIDE TUBES USED
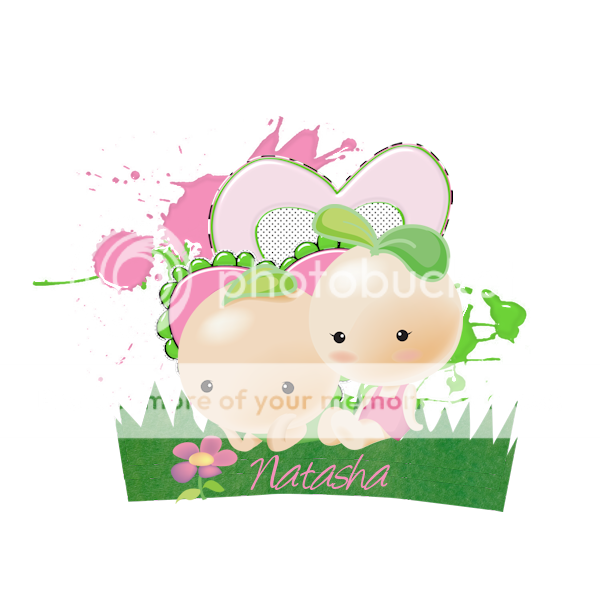
This tut was written on 26 February 2010 By Samantha
any similarities is completely coincidental.
Create new raster layer 600x600
you can flood fill white if you prefer.
Open SKD Heart2 copy and paste as new layer
resize by 70%
Move to the center
Open SKD_Heart copy and paste as new layer
resize by 70%
move toward the center but slightly lower than
the first one
open your GCZ _ Green splat
copy and paste as new layer
move below both heart layers
Now open your GCZ_pink splay
copy and paste as new layer
Moving above yuor green splat
go to image and fit flip.
adjust to ur liking
open GCZ baby 2
copy and paste as a new layer
resize by 60%
open GCZ grass
copy and paste as new layer
resize by 50%
Move to the bottom of the flower on your baby
Move behind the baby layer
Duplicate the grass and move up slightly
Make it to where it looks like they are sitting
on the grass Duplicate a third time if you need to
Add your name and your done..
I will be back with another featuring this great kit :)
Thursday, February 25, 2010
Irish Luck
A mini Tut featuring a great Irish Luck Kit by Addicted 2 Scraps
It is a FTU Kit. So if you download please Leave Lots of love
Tube used is Ismael Rac. You can purchase his work and a
license to use at AMI .
Mask178 by Weescotslass.

Create New raster layer 600x600
you can flood fill white, but I prefer transparent. Open paper 4
copy and paste as new layer
Open your mask as a new image
Go to layer, New Mask Layer, From Image
Open your mask of choice.
Merge Mask Group
open your tube
copy and paste as new layer
place in the center of your Merged Mask
open element 10 copy and paste as new layer
Move below your tube layer toward the bottom
Duplicate and mirror
open element 14
copy ans paste as new layer
move below your tube layer as well
Add Text of choice.
Copyright and your name
Save and your complete.
Wednesday, February 24, 2010
Candy Kisses
It is a pleasure to be working with Gina from
Ginas Gems Tuts N Stuff. She has great scrapkits.
This Tut is Featuring Her Pink Candy Kisses Scrap Kit.
You can purchase this Kit at Twilight Scraps.
Tube of Choice. I am using the Work of Keith Garvey.
You can purchase his work at MPT.
Mask178 by Weescotslass.

This tutorial was written by Samantha on 24February2010.
Any similarities to this is completely coincidental.
Create New raster layer 650x650
You can flood fill white but I choose to leave it transparent
Name this Background layer
Open Knotted Ribbon Heart Frame 1
Copy and paste as new layer
resize down by 80%
Open tube of choice
Copy ans paste as new layer.
I am using the Closeup layer first
Move below your frame layer
highlight the frame layer and grab your magic wand
Click inside the frame
go to selections, modifty and expand by 5
Highlighting your tube layer
go to selections and invert
Hit Delete
highlighting your background layer
Open a paper of choice, I am using paper 9
copy and paste as new layer
Open your mask as a new image
Go to layer, New Mask Layer, From Image
Open your mask of choice.
Merge Mask Group
Adjust your mask to where the heart is in the center
highlight your tube layer and add a Luminance Legacy to your tube.
Open your tube once again and grab a full size image
Copy and paste as new layer move above your heart frame
Go to image and mirror this layer
Move to the right
Open paper heart 4
copy and paste as new layer
resize down by 50 %
Moving below your frame layer
Add a free rotate to the left by 25
Open peppermint heart 1
Copy and paste as new layer
Resize down by 50%
Move below your frame layer
placing the bottom of the heart over
the bottom of the paper heart
open Teddy Bears 2 copy and paste as new layer
Resize down by 20 %
Move to the bottom of the frame
Open butterfly 6
Copy ans paste as new layer
resize down by 50 %
Move to the top left
Add your copy right and name
Dont forget to save.
Send me your results.
You can email them to
I would love to display them on my blog..
Monday, February 22, 2010
Bella's Heart
Bella's Heart is using a beautiful Kit
by Dark Pheonix Designs, It is a PTU Scrap Kit.
You can visit her blog here.
Mask 219 is by Weescotslass Creations
Images from Twilight, you can find them on Google.

This tutorial was written on 22 February 2010, but Samantha
Made from my own imagination. Any similarities ic completely coincidental.
Create new raster layer 650x650
Open paper 4 copy and paste as new layer
Resize to your liking
Hide that layer we will get back to that.
Open Element 17 copy and paste as new layer
resize by 70%
take your image copy and paste as new layer
Place below the Element 17
erase what is sticking out of the sides of the frame
Open element 10 copy and paste as new layer
resize by 60%, move to the left
free rotate by 20 % to the left
Open element 12 copy and paste as new layer
resize by 20 % and move to the left
PLace the circle over one of the ones on the frame
Move below element 10
Open element 9
copy and paste as new layer
resize by 40%
Move to the left
place over your heart
And free rotate to the left by 10%
Move below your heart layer.
Unhide you paper layer
go to layer, load/save mask
I am using mask 219 By Weescotlass
merge mask group and resize to your liking
Add your name and copy right.
Your done.
Friday, February 12, 2010
Be Mine
Scrap Kit and poser by Emma @ Sensual Posers .
Mask of choice. I am using WSL 185 by Weescotslass Creations
Mehdi filter you can download from here.
Mehdi filter you can download from here.

This tutorial was written on 13 February 2010 by Samantha
Any similarities to this is completely coincidental.
Create new raster layer 600x600
open element 17 copy and paste as new layer centering
open poser 3
copy and paste as new layer
resize by 50%
make sure that rezie all layers is unchecked.
Mirror and move down just a little
open paper 5
copy and paste as new layer
go to layers load/save mask
load mask from disk
Mege mask group
add a drop shadow to your masklayer
open element 10
copy and paste as new layer
Move to the top right
and resize by 80%
open element 15
copy and paste as new layer
move above your mask layer
Go to Effect and down to where your
plugins are located.
find your Mehdi plugin
Go to Melt
use the following settings
size 5
amount 29
ratio 0
open element 20
copy and paste as new layer
resize by 51%
Move top left
Highlighting your Element 17 layer
open your text tool
I am using MeaCulpa
You can what ever
size of the font is 12
type in be Mine i am making
it a red from the poser
add a gradient glow
add your name and copy right and save
send me your results id love to see them
XOXO
Samantha
Tuesday, February 9, 2010
Bee My Valentine

Scrap kit Sweetheart (FTU) By Jenny's Designz
Template 141 by Kristin @ Toxic Desirez
Tube by Ismael Rac - Purchased @ Artistic Minds
Mask 218 by Weescotslasscreations
Open template hit Shift D.
This will duplicate your template Close your origional file
Delete your copyright layer
Canvas size to 750x650
Hide your white bakc ground layer
Open paper 4 copy and paste as new layer
Move above your pink rectangle layer
and hide the paper layer
With your rectangle layer highlighted
Grab your magic wand and select inside the rectangle
unhide your paper layer and highlight it
To to Selections and Invert
hit delete ( this should delete the excess paper )
Open your tube
copy and paste as new layer
carefully erase the bottom part
of your tube that is below your circle layer
Open Frame 3
copy and paste as new layer
resize by 73% and then again by 95 %
Move below your tube layer
Like i did
highlight your white background layer
open paper 5
copy and paste as new layer
Open Mask of Choice
Go to layer- New Mask Layer
Load from Image
Merge Mask group
open your seedbeads
copy and paste as new layer
Move above your mask layer
Resize by 95 %
Add your copyright and name
Save and your complete
I would love to see your results
Please send them too
sweetindulgence09@gmail.com
xoxo,
Samantha
Saturday, February 6, 2010
Sweetest Valentine
Finally another tut for valentines day.
Scrap Kit by Vicki @ Pink Princess Scraps
Tube of Choice, I am using the art work of Ismael Rac - Do not use without a proper license to do so
Tube of Choice, I am using the art work of Ismael Rac - Do not use without a proper license to do so
you can purchase his work and proper use to use @ Artistic Minds
mask of choice - i am Vix_Mask363 by Vix. You can download here
mask of choice - i am Vix_Mask363 by Vix. You can download here

This tutorial was written on February 6, 2010 by Samantha
Any similarities to this is completely coincidental
Create new Raster layer 600x600 - rename background layer
open ele32 copy and paste as new layer
open your tube copy and paste as new layer
Move below your ele32
Erase the botom part of the tube carefully.
Highlight your background layer
and open a paper of choice
I am using pp2
copy and paste as new layer
go to layer and load and save mask
merge mask group
Add a drop shadow to your mask
open ele15
copy and paste as new layer
resize by 40%
move to the bottom right
open ele9
copy and paste as new layer
resize by 70%
move behind your bear.
open ele34
copy and paste as new layer
resize by 70%
Move below your heart
add your copyright
name and your done.
Dont forget to save.
Subscribe to:
Comments (Atom)
My Blinkie ☆
