About Me ☆

Hello, I am Sami, the Girl behind Guilty Pleasures. I have been
writing tutorials since May 22, 2009. My first tutorial was called Twilight Obsession. How I got my name is simple. I found tagging to be my Guilty Pleasure. I thought it fit perfectly. I am a designer as well. You can find links to my blogs on my top menu. If you have questions please feel free to ask. Other wise you can read more about me on my
ABOUT ME PAGE!
My Blogs☆

Store Manager ☆

CT Manager☆


Favorite Blogs ☆


My Hangouts☆


Monday, March 29, 2010
Easter Celebration

Addicted 2 Scraps PTU kit Spring has Sprung
Easter Template 9 From Tracy F @ Freebie Friend
Hit Shirt+D to duplicate
Close your original template
Canvas resize by 700x550
Delete your copyright layer
Select your rectangle
Grab your magic wand and click the
rectangle
copy and paste as new layer
Go to selections and invert.
Highlight your paper layer and hit delete.
Do the same thing with Paper 9 for
the oval layer
Open element2
copy and paste as new layer
Resize by 70%
Grab your magic wand and highlight
the circle layer
Click inside and once that is selected
Go to selections
Invert
highlight the element2 layer and hit delete
highlight your egg layer
Grab your magic wand and select it.
Open paper 12 copy and paste as new later Go to selection and hit invert then deleteOpen element 28
copy and paste as new layer
resize by 40%
Move above your rectangle later
and to the right
Duplicate it and Mirror
open element 37
copy and paste as new layer
Resize by 30%
Move Below the bunnies
Duplicate and mirror
Add your name and copy right and save.
Your done.
Friday, March 26, 2010
Thorns
Immortal Dreams has awesome scrap kits.
She is an awesome designer and I love her kits.
I had the pleasure to work with her Wicked Thorns Kit
Its a beautiful PTU kit.. You can purchase @ Scraps With Attitude
Poser used is by Lisa aka aka Sophisticated Sraps

This tutorial was written on 3/26/2010 by Samantha aka Sweet Indulgence
This is using my own creativity, any similarities is coincidental.
Create new raster layer 700x700
we will resize it layer
open frame 2 copy ans paste as new layer
resize down by 70%
open paper 6
copy and paste as new layer
move below your frame layer
grab yuor eraser and carefully
erase the part that is on the
outside of the frame..
open one of the posers and
copy ans paste as new layer
move above all other layers
Resize down by 50% and then
by 70%
open the crow
copy and paste as new layer
resize down by 20% and place
on the top of the frame
Open the blood
copy and paste as new layer
Move below all other layers
duplicate and mirror
place on the sides of the frame like mine
Hide the poser layer for
right now
Open the book
copy and paste as new layer
resize down by 15%
move to the left of the frame
free rotate left by 14 %
oen skull 2
copy and paste as new layer
resize down by 15%
Move above your book
Unhide your poser layer
Move down just abit
Open Blackrose 2
copy and paste as new layer
resize by 20%
Move below the book to the left
Open cross2
copy and paste as new layer
resize to your liking and
Move below the rose layer
See mine for placement
Add your name copyright and your done
resize to your liking and don't forget to save
Wednesday, March 24, 2010
I love Twilight
Scrap kit By Grunge &Glitter
You can purchase this kit @ GrungeandGlitter Store.
Tube is a Free to Use tube By Zindy S.D. Nielsen

Create new raster layer 600x600
Open frame2 Copy and paste as new layer
resize by 80%
open tube
hide the copyright layer
Make sure your Tube layer is highlighted
Copy and paste as new layer
Place the faces center of the frame
highlighting your frame layer
Grab your magic wand and select inside the frame
Go to Selections Modify and expand by 8
Highlight your tube layer
Go to selection and invert
Hit Delete
Open paper 7
copy and paste as new layer
Move below all other layers
Go to layers load/save mask.
I am using Mask 219 By Weescotslass Creations
Merge mask Group
open your doodle
copy and paste as new layer
Move below your mask layer
Duplicate, mirror and flip
Open your rose
copy and paste as new layer
resize by 50% and move to the bottom left
of your frame
Open your key
copy and paste as new layer
resize by 50 and then again by 60
free rotate to the left by 14%
See mine for placement
Open word art 5
Copy and paste as new layer
resize by 60%
Move to the bottom of your frame
Add your name and copyright.
Save and your done..
Monday, March 22, 2010
Touch of Night
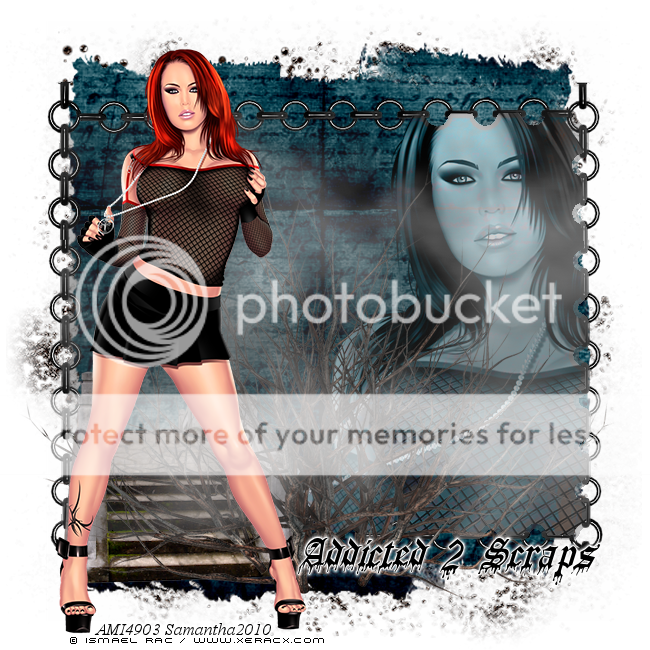
This tutorial is featuring a brand new
scrap kit by Addicted 2 Scraps. It is PTU Kit
Tube by Ismael Rac. Do not use his work unless
you have a license to do so.
Create new raster layer 650x650
You can flood fill white but I
am leaving it with a transparent background
Open Element12
copy and paste as new layer
open your tube close up layer
Copy and paste as new layer
Grab your magic wand
Highlight the Element 12 layer
And select inside of it
Go to Selection, modify and expland by 5
highlight your close up layer
Go to selections invert and hit delete
Add a Lumance Legacy to that
Open Element1 copy and paste as new layer
Move behind all other layer
Now open element49
copy and paste as new layer
Resize by 50% and then again by 80%
move to the left hand side of element12
See mine for exact placement
Open element45
copy and paste as new layer
Move to the bottom and duplicate
move the duplicate layer toward the top
Highlight element 12 layer
grab your magic wand and select
go to Selections modify and expand by 10
Highlight the element 45 layer
and hit delete
Do the same with the duplicate layer
open element 47
copy and paste as new layer
move above the bridge layer
Placing in the center
It will have that old foggy look to it
Open element 34
copy and paste as new layer
Move below all other layer
Resize up to your liking
open Your full body tube
copy and paste as new layer
Placing to the left above all other layers
Add your name Copyright and your done..
do not forget to save.. Easter Morning
Scrap Kit by Gina.
It is a FTU kit that you can download from her blog
Tube by Elias Chatzoudis.
Do not use with out a license to do so.
Mask 226 by Weescotslass Creations

This tutorial was written by Samantha on 22March2010
any similarities to this is completely coincidental.
Create new Rater layer 600x600
open frame 1
copy and paste as new layer
resize down by 70%
open your tube close up
copy ans paste as new layer
Move below your frame
Grab your magic wand and select inside the frame
Go to selection, modify and expand by 5
Highlight your tube layer
selections, invert and hit delete
open paper 5
copy and paste as new layer
Go to layers, load and save mask
merge mask group
add a drop shadow to your mask group
open doodle2
copy ans paste as new layer
move below all other layers
duplicate and flip and mirror
open butterfly4
copy and paste as new layer
Mirror and resize down by 60%
See mine for placement
Open your full version of the tube
copy and paste as new layer
see mine for placement
Now go back to the tube that is below
the frame and add a luminace legacy to it
open candybunny1
copy and paste as new layer
resize by 60%
Move below yuor full tube
and place near the bottom of the frame
Open 3 of your eggs
I am using eggs 1,3,and 5
copy and paste all ass new layer
Resize all 3 eggs by 40% and then by 80%
Move below your candy bunny
Add your name and copyright
save and your done
Sweetest Times
Yes, another tutorial
Using a Fantastic Kit by Artlor Designs
Its a PTU Kit that you can purchase @ Your Scrap Addiction
Tube of is the work of Keith Garvey.
Do not use unless you have a license to do so
Purchase this and his work at MPT

This tutorial was written on 22 March 2010 by Samantha
This is completely my imagination. Any similarities is completely
coincidental..
Create new raster layer
600x600
Open frame 3
copy and paste as new layer
resize by 30 and then again by 50%
open paper 17 copy and paste as new layer
Move below your frame layer
Go to layer load/save mask
I am using Mask226 by Weescotslass Creations,
merge group
Open Your tube of choice.
Copy and paste as new layer
Move below your frame layer
carefully erasing the legs that are below
the frame
Now duplicate your frame
Move above your tube layer
erase the parts of the frame
that is covering her hands and head.
open bear 2
copy and paste as new layer
resize down by 20% and again by 50 %
Place bottom left of the frame
open your diamond bling
copy and paste as new layer
resize down by 20%
move above your mask layer
just below the bottom of your frame layer
open your heart bouquet
Copy ans paste as new layer
resize down by 20% and then again by 60
move to the top right
See mine for placement
open sparkle3 copy and paste as new layer
resize down by 20%
Move below your diamond bling
duplicate and mirror
Merge Sparkle layers
add a slight drop shadow
Add your name and copyright
save and your done..

Wednesday, March 17, 2010
Dark Beauty
This Beautiful tutorial is featuring a
wonderful scrapkit by Jessica @ Gothic Inspirations
It is part of February' s DarkCravings Blog Train. You
can get this kit here
can get this kit here
Artwork is By Ismael Rac.
Please do not use if you dont have a license to do so.
You can purchase his work and a license @ AMI .
Font is TheNautiGirl

This tutorial was written on 17March2010 by Samantha
This is completely my imagination.. Any similarities to this is completely Coincidental.
Create new Raster layer 600x600
open frame 3 copy and paste as new layer
open your tube copy and paste as new layer
move below your frame
Grab your magic wand
highlight your frame layer
select inside the frame
Once you see the marching ants
Go to selections, modify and expand by 9
highlight your tube layer
Go to selections, invert and hit delete
open your tagback grid copy and paste as new layer
resize down by 90%
Move below your tube layer
open paper 14 copy and paste as new layer
Move just about your tagback layer
Grab your eraser and carefully erase the paper
On the outside of the frame.
go back to your tube layer and Add Luminace Legacy to it
Mirror your tube
open the cross with ribbon copy and paste as new later
Resize down by 80 %
Move to the top left of your frame
Open your tube once again
Copy and paste as new layer
Make sure it is above all other layers
Mirror and move to the right
open the bloodsplatter
copy and paste as new layer
Move just above your tag back layer
Duplicate 4 times and place in the
4 corners of the frame
Add your name and copyright.
dont forget to save. Your done..
Wednesday, March 10, 2010
Shamrock Stalker

Ismael Rac happens to be one of my favorite
Tube artists. So I thought this was fitting.
This Tutorial was re written on March 10, 2010
BY Samantha. Any similarities to this is completely coinicdental.
Lets Begin
Scrap Kit is Stalkers St. Patricks Day
FTU Kit by Black Widows Creationz.
Tube by Ismael Rac. Remember to use his work.
You must first purchase it and a license to use at AMI.
Mask178 by Weescotslass Creations
Create new layer 600x600
Open frame 3
copy and paste as new layer
Make sure it is centered.
Open paper 5
copy and paste as new layer
Move below your frame layer
Open your mask
Go to layers
load mask from disk
merge mask group
open Mushrooms 1
copy and paste as new layer
place above your mask layer
Open tube of choice
copy and paste as new layer
Move above all other layers
move center right
Open potofgold1
copy and paste as new layer
move below your tube layer
Resize by 45%
Move bottom left
Open teddy1
copy and paste as new layer
resize 40%
Move infront of your pot of gold
Open hat 2
copy and paste as new layer
Resize by 60%
Mirror image
Move behind your pot of gold.
Add your name and copyright your done.
It did it this way so the copyright can be seen
Open frame 3
copy and paste as new layer
Make sure it is centered.
Open paper 5
copy and paste as new layer
Move below your frame layer
Open your mask
Go to layers
load mask from disk
merge mask group
open Mushrooms 1
copy and paste as new layer
place above your mask layer
Open tube of choice
copy and paste as new layer
Move above all other layers
move center right
Open potofgold1
copy and paste as new layer
move below your tube layer
Resize by 45%
Move bottom left
Open teddy1
copy and paste as new layer
resize 40%
Move infront of your pot of gold
Open hat 2
copy and paste as new layer
Resize by 60%
Mirror image
Move behind your pot of gold.
Add your name and copyright your done.
::NOTE::
The original tag does not have the white background.It did it this way so the copyright can be seen
Subscribe to:
Comments (Atom)
My Blinkie ☆
