About Me ☆

Hello, I am Sami, the Girl behind Guilty Pleasures. I have been
writing tutorials since May 22, 2009. My first tutorial was called Twilight Obsession. How I got my name is simple. I found tagging to be my Guilty Pleasure. I thought it fit perfectly. I am a designer as well. You can find links to my blogs on my top menu. If you have questions please feel free to ask. Other wise you can read more about me on my
ABOUT ME PAGE!
My Blogs☆

Store Manager ☆
CT Manager☆



Favorite Blogs ☆







My Hangouts☆


Showing posts with label The Creativity Box. Show all posts
Showing posts with label The Creativity Box. Show all posts
Friday, March 9, 2012
Wicked Teal

Written on 3.8.12
Scrap is a Beautiful PTU Kit by Angel Designz
Kit can be purchased at The Creativity Box
Tube is by Arthur Crowe, You can purchase his amazing work
and a license to use at Arthur Crowes Factory
New raster layer 700x700
Open Frame 1 copy and paste as new layer
Open tube copy and paste as new layer
Move below frame Erase part of the tube that is sticking out of the frame.
Open paper 11 copy and paste as new layer
Move behind the tube layer
Erase the parts of the paper that is on the out side of the frame ..
Highlight the tube layer and add a luminace legacy
Open the glitter splash copy and paste as new layer
Resize up by 110% Move to the bottom left
Duplicate mirror and flip.. This should put it at the top right
Open the Wirebacking copy and paste as new layer
Move below tube layer
Place to where it is behind the tube
Erase the parts of the wire that is sticking out of the frame
Highlight the frame layer and open your full length tube
Copy and paste as new layer
Resize down by 80 %
Flip and move to the right
Open Ribbon 2 copy and paste as new layer
place to the right and move behind the tube layer
Open the butterfly copy and paste as new layer
Resize to desired and move to the top left
Near the top of the Guitar
Open the Plush Animal copy and paste as new layer
Resize down by 80% to desired.. I say about 4 times
Place above all other layers as mine is
Open your sparkle copy and paste as new layer
Move to the bottom
Duplicate and move below the tube layer
Highlight the origional sparkle layer
Grab the eraser and erase the parts of the sparkle that is on
the boots and the plushy.
open the Wire Element, copy and paste as new layer
Move behind the tube layer
Open the Gear copy and paste as new layer
Resize down by by 80% 3 times and move
Behind the tube layer and to the right
Add your name copyright and save
Open Frame 1 copy and paste as new layer
Open tube copy and paste as new layer
Move below frame Erase part of the tube that is sticking out of the frame.
Open paper 11 copy and paste as new layer
Move behind the tube layer
Erase the parts of the paper that is on the out side of the frame ..
Highlight the tube layer and add a luminace legacy
Open the glitter splash copy and paste as new layer
Resize up by 110% Move to the bottom left
Duplicate mirror and flip.. This should put it at the top right
Open the Wirebacking copy and paste as new layer
Move below tube layer
Place to where it is behind the tube
Erase the parts of the wire that is sticking out of the frame
Highlight the frame layer and open your full length tube
Copy and paste as new layer
Resize down by 80 %
Flip and move to the right
Open Ribbon 2 copy and paste as new layer
place to the right and move behind the tube layer
Open the butterfly copy and paste as new layer
Resize to desired and move to the top left
Near the top of the Guitar
Open the Plush Animal copy and paste as new layer
Resize down by 80% to desired.. I say about 4 times
Place above all other layers as mine is
Open your sparkle copy and paste as new layer
Move to the bottom
Duplicate and move below the tube layer
Highlight the origional sparkle layer
Grab the eraser and erase the parts of the sparkle that is on
the boots and the plushy.
open the Wire Element, copy and paste as new layer
Move behind the tube layer
Open the Gear copy and paste as new layer
Resize down by by 80% 3 times and move
Behind the tube layer and to the right
Add your name copyright and save

Monday, February 6, 2012
Polkadot Blast

Scrap Kit is PolkaDot Blast by Kairinakat Kreations.
Tube is by Keith Garvey, You can now purchase @ PTE
Tube is by Keith Garvey, You can now purchase @ PTE
New raster layer 700x700 resze later if needed
Open element 92 copy and paste as new layer
Resize down by 80%
Open tube and grab the close up layer
Copy and paste and position behind the frame in both sides as desired.
Erase parts of the tube that is sticking out from both sides of the frame layer
Open paper 9 copy and paste as new layer
Move below all other layers
Grab your eraser and erase the part of the paper that is on the out side of the Frame layer as well
Go back to your tubes - Add a Radience with the settings below and then a luminace legacy)
Open element 92 copy and paste as new layer
Resize down by 80%
Open tube and grab the close up layer
Copy and paste and position behind the frame in both sides as desired.
Erase parts of the tube that is sticking out from both sides of the frame layer
Open paper 9 copy and paste as new layer
Move below all other layers
Grab your eraser and erase the part of the paper that is on the out side of the Frame layer as well
Go back to your tubes - Add a Radience with the settings below and then a luminace legacy)

*CLICK TO VIEW LARGER IMAGE*
Highlight your frame layer and open your tube once again
Copy and paste your full body Tube layer
Paste in the center of the frame and add a porcelin Effect with the settings below
Highlight your frame layer and open your tube once again
Copy and paste your full body Tube layer
Paste in the center of the frame and add a porcelin Effect with the settings below

*CLICK TO VIEW LARGER IMAGE*
Open element 2 copy ans paste as new layer
Resize ot desired and move below full length tube layer
Open element 9 copy and pasrte as new layer
Move just below the tube layer
Open element 7 copy and paste as new layer
Resize to desired and place on the boxes
Open element 84 Copy and paste as new layer
Resize to desired and place bottom left of the frame
Add your name copyright and Save.
Open element 2 copy ans paste as new layer
Resize ot desired and move below full length tube layer
Open element 9 copy and pasrte as new layer
Move just below the tube layer
Open element 7 copy and paste as new layer
Resize to desired and place on the boxes
Open element 84 Copy and paste as new layer
Resize to desired and place bottom left of the frame
Add your name copyright and Save.

Wednesday, January 18, 2012
Kiss - VeryMany

Scrap Kit is PolkaDot Blast by Kairinakat Kreations.
You can purchase this kit at The Creativity Box
Tube is by Verymany. Please do not use without a proper License Number.
Tube is by Verymany. Please do not use without a proper License Number.
You can purchase her work and receive a license to use at Pics for Design
New Raster layer 650x650
open element 58 copy and paste as new layer
resize to liking and free rotate to the left by 21%
open your close up tube layer
copy and paste as new layer
Resize to liking and place below frame layer
Erase the parts of the tube that is on the outside of the frame layer
Duplicate Tube layer and hide for now
add the following effects to the main tube layer
Effects that is added to the tube is
Xero Porcelain

BW Film

Gaussian Blur

Unhide the duplicated tube layer and add an overlay
Open paper 5 copy and paste as new layer
place below all other layers Resize down by 70%
Erase the parts of the paper that is on the outside of the
frame layer
Hit Shift+S and Duplicate the image
Copy Merged on the Duplicated Image
and Paste as new layer
Mirror and Move near the bottom
Paste as new layer again
and move near the top
Move the bottom image to where the frame is overlapping the corner
of the top.
Hide All layers of the Duplicated Image
Open your Tube once again
copy and paste your full length tube
resize to your liking place as desired
Highlight your tube layer
Open element 63
copy and paste as new layer
Place to the center of the overlapping Frame layers
Open element 55 copy and paste as new layer
Resize down by 80% twice and place to the bottom of the full length tube , covering the legs
Open element 22 copy and paste as new layer
Move below all other layers to the right
add your name copyright and save

Monday, January 9, 2012
Smoken Angel - PTU

This Tutorial was written on 9 January 2011 by Sami using my own creativity and imagination.
Any similarities to this is completely coincidental.
Tube is by Jessica Dougherty you can purchase at CDO
Scrapkit is a PTU kit by Angel's Designz
You can purchase this at The Creativity Box
Font used is Monika it is a free font from Dafont
New raster layer 700x700
tube is by Jessica Doughtery -CDO
Scrap Kit Racs Angel by Angel Designs
open frame 1 copy and paste as new layer resize down by 80%
Open tube scale up and copy and paste behind frame layer
Erase what is on the outside of the tube Duplicate and hide the duplicated layer
highlighting the origional tube layer
tube is by Jessica Doughtery -CDO
Scrap Kit Racs Angel by Angel Designs
open frame 1 copy and paste as new layer resize down by 80%
Open tube scale up and copy and paste behind frame layer
Erase what is on the outside of the tube Duplicate and hide the duplicated layer
highlighting the origional tube layer
add Xero - Porcelin, Black and white film and Gaussian blur by 20
Unhide the duplicated tube layer
and add Xero - Porcelin and an over layer
open paper of choice I am using paper 6
Copy and paste as new layer
Move below all other layers
grab your magic wand and highlight the frame layer and click inside the frame,
Unhide the duplicated tube layer
and add Xero - Porcelin and an over layer
open paper of choice I am using paper 6
Copy and paste as new layer
Move below all other layers
grab your magic wand and highlight the frame layer and click inside the frame,
Go to selections, Modify and expand by 6
highlight your paper layer - Go to selections and invert and hit delete.
Open your tube again copy and paste as new layer
Resize up by 110% Duplicate frame layer
Place the tube to where it is inbetween both frames
Move up just slightly
Grab your eraser and erase the bottom parts of the tube
Now Highlight your duplited frame layer and erase parts of the
frame that is covering up the tube layer
open the Wire copy and paste as new layer
move below all others
Open Splat 1 copy and paste as new layer move above the wire layer
open the butterfly copy and paste as new layer
move above all others
Resize down by 80% x 2 and move to the bottom left
open key and Lock copy and paste as new layer
resize down by 80% to desired size, Place to the right. I have
mine on the wire slightly..
open white splat copy resize up by 110% copy and paste as new layer
Move below all other layers
Add your name and copyright Save and complete..
I decided to keep this one simple but elegant..
highlight your paper layer - Go to selections and invert and hit delete.
Open your tube again copy and paste as new layer
Resize up by 110% Duplicate frame layer
Place the tube to where it is inbetween both frames
Move up just slightly
Grab your eraser and erase the bottom parts of the tube
Now Highlight your duplited frame layer and erase parts of the
frame that is covering up the tube layer
open the Wire copy and paste as new layer
move below all others
Open Splat 1 copy and paste as new layer move above the wire layer
open the butterfly copy and paste as new layer
move above all others
Resize down by 80% x 2 and move to the bottom left
open key and Lock copy and paste as new layer
resize down by 80% to desired size, Place to the right. I have
mine on the wire slightly..
open white splat copy resize up by 110% copy and paste as new layer
Move below all other layers
Add your name and copyright Save and complete..
I decided to keep this one simple but elegant..
Monday, November 7, 2011
Beautiful Angel - PTU

own creativity and imagination. Any similarities is completely unintentional and coincidental.
******************************
Tube is by Ismael Rac. You can purchase at his store HERE.
Please do not use his work with out a proper license.
Scrapkit is a PTU kit by Angel's Designz
You can purchase this at The Creativity Box
New Raster Layer 700x700
Open Film strip copy and paste as new layer
Resize down by 80% Move near the bottom
Open Paper 12 copy and paste as new layer
Move below all other layers
Grab your selection tool
Make a rectangle that is the length of the frame
Go to selection invert, Highlight your paper layer and hit Delete
Open your Tube Move below all other layers
Copy and paste as new layer
Place different parts of her in the filmstrip
Grab your selection tool
Make a rectangle that is the length of the frame
Go to selection invert, Highlight your tube layer and hit Delete
Do this for every Tube layer you have that is going inside the frame
Merge all tube layers and add a luminance Legacy
Copy and paste your tube again
Place it to where her legs are on the bottom of the filmstrip This time place her in the center
Open your feather fan copy and paste as new layer
Move below the tube layer
Place on top of the film strip in the center
open your messy scatter copy and paste as new layer
Move below all other layers
Move up to where it is above the fan just alittle
Open your doodle copy and paste as new layer
resize down to your liking Move below the fan layer
Duplicate and flip
Open Sparkle 3 copy and paste as new layer
Move above your doodle layer
Add your name, Copyright Save and your done


Thursday, November 3, 2011
Emo Forum Set - PTU
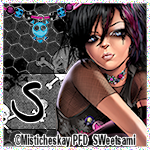
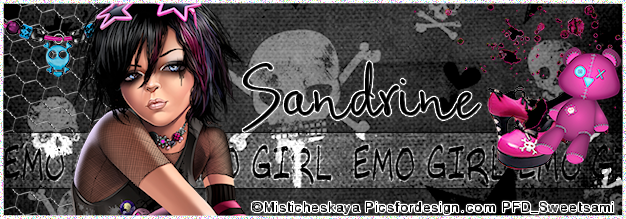
Scrap kit Emo Girl by Rebellious Scraps.
It is a PTU Kit you can purchase at The Creativity Box
Tube is by Misticheskaya, You can purchase at Pics For Design
********************************
This Tutorial was written on Friday 1November 2011 by Sami aka Guilty Pleasures
using my own creativity and imagination. Any similarities is completely coincidental.
For your Avi (Create new raster layer 150x150 )
For Signature ( New Raster Layer 650x250)
Open paper 5 copy and paste as new layer
Resize paper down to your liking, Create new layer
Go to selection, select all,
Go to selections, Modify and selection to border by 3 inside
Flood Fill white
Go to adjust and add Noise ( Random by 50%)
Open your Wire copy and paste as new layer
Resize down to your liking and move above your paper layer
Open your Tube, copy and paste as new layer
Resize down to your liking and place to the left above the wire.
Create new raster layer and Grab your selections tube and create a rectangle
Flood Fill White and add an overlay
Go to effects and add a gradient Glow, Change the color to black and hit ok
Open bracelet 2 and resize to your liking
Copy and paste as new layer
Move to the top
Open your emo bear and resize down to liking
Copy and paste as new layer place to the right to where it is sitting on the Black Gradient Glow
Open your splatter resize to your liking and move to the top right below the Bear
Open your shoes copy and paste as new layer, resize to your liking and move below your bear
Add your name copyright and save.
Friday, October 28, 2011
Emo Girl - PTU

Scrap kit Emo Girl by Rebellious Scraps.
It is a PTU Kit you can purchase at The Creativity Box
Tube is by Verymany, You can purchase at Pics For Design
Masks is 365 by Vixpsp
********************************
This Tutorial was written on Friday 28 October 2011 by Sami aka Guilty Pleasures
using my own creativity and imagination. Any similarities is completely coincidental.
New Raster Layer
800x800
we will resize later
open your film strip copy and paste as new layer
Open your tube copy and paste as new layer
Open paper 9 copy and paste as new layer
Move below all other layer
Grab your selection tool and make a rectangle that is the size of the frame
Selection, invert, highlight paper layer and delete
Move tube layer about your paper layer and place in a section of the frame
highlight the frame
With your magic wand click inside the frame selection
Go to selections invert and delete
Do this with the 3 other parts of the frame
Merge and add a luminace legacy
Open your tube again
copy and paste as new layer
Resize down by 80 % and place to where she is sitting on the frame
Open both sparkles
copy and paste as new layer
Open your splatter copy and paste as layer
Move above the sparkles
Open the barbwire
copy and paste as new layer Move directly below the tube layer
The bottom edge is on the top of the frame
Open paper 2 and move below all other layer
Open your mask I used 365 by vix
Go to layer new mask layer from image select it from the drop down and hit ok
Merge group
Open your shoes
copy and paste as new layer
Resize to your liking and place below the tube layer on the right side
Open your nail polish and handbag 2
copy and paste as new layer
Resize both to your liking and place to the right below
the tube layer
Open your emo bear
copy and paste as new layer
Resize to your liking and place on the frame
in the center
Now is where you will chop off any extra that you do not want
Add your name and copy right
save and your complete
800x800
we will resize later
open your film strip copy and paste as new layer
Open your tube copy and paste as new layer
Open paper 9 copy and paste as new layer
Move below all other layer
Grab your selection tool and make a rectangle that is the size of the frame
Selection, invert, highlight paper layer and delete
Move tube layer about your paper layer and place in a section of the frame
highlight the frame
With your magic wand click inside the frame selection
Go to selections invert and delete
Do this with the 3 other parts of the frame
Merge and add a luminace legacy
Open your tube again
copy and paste as new layer
Resize down by 80 % and place to where she is sitting on the frame
Open both sparkles
copy and paste as new layer
Open your splatter copy and paste as layer
Move above the sparkles
Open the barbwire
copy and paste as new layer Move directly below the tube layer
The bottom edge is on the top of the frame
Open paper 2 and move below all other layer
Open your mask I used 365 by vix
Go to layer new mask layer from image select it from the drop down and hit ok
Merge group
Open your shoes
copy and paste as new layer
Resize to your liking and place below the tube layer on the right side
Open your nail polish and handbag 2
copy and paste as new layer
Resize both to your liking and place to the right below
the tube layer
Open your emo bear
copy and paste as new layer
Resize to your liking and place on the frame
in the center
Now is where you will chop off any extra that you do not want
Add your name and copy right
save and your complete
Subscribe to:
Posts (Atom)
My Blinkie ☆