About Me ☆

Hello, I am Sami, the Girl behind Guilty Pleasures. I have been
writing tutorials since May 22, 2009. My first tutorial was called Twilight Obsession. How I got my name is simple. I found tagging to be my Guilty Pleasure. I thought it fit perfectly. I am a designer as well. You can find links to my blogs on my top menu. If you have questions please feel free to ask. Other wise you can read more about me on my
ABOUT ME PAGE!
My Blogs☆

Store Manager ☆

CT Manager☆


Favorite Blogs ☆


My Hangouts☆


Tuesday, November 22, 2011
Blueberry Snowflake Signature

This tutorial was written on November 22, 2011 by Guilty Pleasures.
Any similarities to this is completely coincidental.
Kit Blue berry Winter by Mirka Designs
You can purchase her kits @ Vivid To Vintage
Mask 435 by Vixpsp
New Raster layer 1500x500
We will resize later if needed
Open the letters of your Alpha that you need.
Copy and paste as new layers
Arranging them in order for your name placing in the center
Merge all letters
Open Element 19 Copy and paste as new layer
Move Below the letters and place under the first letter
Duplicate and move to the last letter
Add a Drop Shadow to the name
Open Element 14 copy and paste as new layer
Move Below element 19 and place under the snow flake
Duplicate and move to the right side
open element 2 copy and paste as new layer
Move to the left above all images and place to your liking
open paper 10
copy and paste as new layer
Move below all other layers
Apply your mask layer
Merge Mask Group
Resize to desired size
Add your copyright and save !

Tuesday, November 15, 2011
Belong to You - PTU

Tube is by Misticheskaya -Pics For Design
Kit is Black and White Diva Designs- You can purchase @
new raster layer 700x700
open frame 1 copy and paste as new layer
open your tube copy and paste as new layer
Move below frame layer and resize to liking..
I have the faces in the frame..
Grab your magic wand with ur frame layer highlighted Click inside
selections, modifty expand by 15 and invert. Highlight tibe layer and delete
Go to Effects and Add a porcelin (xero)

GRab your tube again copy and paste as new layer
resize as needed Place the legs at the bottom of the frame
Duplicate frame and move above tube layer
Erase the parts of the frame that covers the tube
Highlight the tube layer
Go to Effects and Add a porcelin (xero)
open paper 1 copy and paste as new layer
Draw a rectagle that is in the center of the frame
Hightlight paper layer
Go to selections, invert and delete
open Chrome leaf 2 copy and paste as new layer
resize to desired.. Erase the leaf of the right
Duplicate the one of the left and mirror
I place mine at the bottom of the frame
Open your heart lock copy and paste as new layer
Resize to your liking and place to the bottom right
of the frame behind your duplicated chrome leaf
open heart doodle 2 copy and paste as new layer
Resize to your liking. Add a glow and move to the bottom left
before the chrome leaf
Add a Drop Shadow ( white )
Add your name, Copy write save and your done
Tuesday, November 8, 2011
Diva by Day - PTU

This Tutorial was written on Tuesday 8 November 2011 by Guilty Pleasures aka Sami
Using my own imagination and creativity. Any similarities is completely coincidental.
Supplies Needed
PTU KIT Devilina by Amy Marie.
You can purchase this at Scrappin' Naturally .
Tube is by Misticheskaya, You must have a license to use her work
You can grab both from Pics For Design
PSPX3 or any version
Create New Raster Layer 700x700
open frame 1 copy and paste as new layer
Resize down by 80%
Open paper 4 copy and paste as new layer
Resize down by 80%
Move below frame layer
Open your tube
Copy & paste as new layer
Position to where her face is in the frame
Move above paper layer
Grab your magic wand highlight frame layer
click inside go to selections Modify and expand by 3
Selections invert, highlight tube layer and Delete
add a luminance legacy
Open your tube layer again copy and paste as new layer
Resize to your liking and position as desired.
open star spiral 3 copy and paste as new layer
Move below all other layer Repeat with Star Spiral 2
Mirror Star Spiral 2 and move to the right
Open string of pearls copy and paste as new layer move to the left
Open Your pink lipstick resize down to liking Move to the left
do the same with your pink nail polish
open your mask copy and paste as new layer
resize to your liking and free rotate to the left by 45
Move under the string of pearls to where it looks like the staple is holding it
open purse 2 copy and paste as new layer
Resize to your liking free rotate to the left by 45
place to your liking
Add your name copyright save and your done..
Resize down by 80%
Open paper 4 copy and paste as new layer
Resize down by 80%
Move below frame layer
Open your tube
Copy & paste as new layer
Position to where her face is in the frame
Move above paper layer
Grab your magic wand highlight frame layer
click inside go to selections Modify and expand by 3
Selections invert, highlight tube layer and Delete
add a luminance legacy
Open your tube layer again copy and paste as new layer
Resize to your liking and position as desired.
open star spiral 3 copy and paste as new layer
Move below all other layer Repeat with Star Spiral 2
Mirror Star Spiral 2 and move to the right
Open string of pearls copy and paste as new layer move to the left
Open Your pink lipstick resize down to liking Move to the left
do the same with your pink nail polish
open your mask copy and paste as new layer
resize to your liking and free rotate to the left by 45
Move under the string of pearls to where it looks like the staple is holding it
open purse 2 copy and paste as new layer
Resize to your liking free rotate to the left by 45
place to your liking
Add your name copyright save and your done..
Monday, November 7, 2011
Beautiful Angel - PTU

own creativity and imagination. Any similarities is completely unintentional and coincidental.
******************************
Tube is by Ismael Rac. You can purchase at his store HERE.
Please do not use his work with out a proper license.
Scrapkit is a PTU kit by Angel's Designz
You can purchase this at The Creativity Box
New Raster Layer 700x700
Open Film strip copy and paste as new layer
Resize down by 80% Move near the bottom
Open Paper 12 copy and paste as new layer
Move below all other layers
Grab your selection tool
Make a rectangle that is the length of the frame
Go to selection invert, Highlight your paper layer and hit Delete
Open your Tube Move below all other layers
Copy and paste as new layer
Place different parts of her in the filmstrip
Grab your selection tool
Make a rectangle that is the length of the frame
Go to selection invert, Highlight your tube layer and hit Delete
Do this for every Tube layer you have that is going inside the frame
Merge all tube layers and add a luminance Legacy
Copy and paste your tube again
Place it to where her legs are on the bottom of the filmstrip This time place her in the center
Open your feather fan copy and paste as new layer
Move below the tube layer
Place on top of the film strip in the center
open your messy scatter copy and paste as new layer
Move below all other layers
Move up to where it is above the fan just alittle
Open your doodle copy and paste as new layer
resize down to your liking Move below the fan layer
Duplicate and flip
Open Sparkle 3 copy and paste as new layer
Move above your doodle layer
Add your name, Copyright Save and your done

Thursday, November 3, 2011
Emo Forum Set - PTU
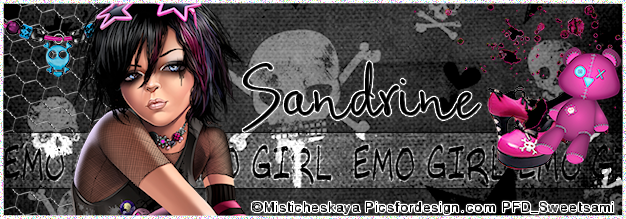
Scrap kit Emo Girl by Rebellious Scraps.
It is a PTU Kit you can purchase at The Creativity Box
Tube is by Misticheskaya, You can purchase at Pics For Design
********************************
This Tutorial was written on Friday 1November 2011 by Sami aka Guilty Pleasures
using my own creativity and imagination. Any similarities is completely coincidental.
For your Avi (Create new raster layer 150x150 )
For Signature ( New Raster Layer 650x250)
Open paper 5 copy and paste as new layer
Resize paper down to your liking, Create new layer
Go to selection, select all,
Go to selections, Modify and selection to border by 3 inside
Flood Fill white
Go to adjust and add Noise ( Random by 50%)
Open your Wire copy and paste as new layer
Resize down to your liking and move above your paper layer
Open your Tube, copy and paste as new layer
Resize down to your liking and place to the left above the wire.
Create new raster layer and Grab your selections tube and create a rectangle
Flood Fill White and add an overlay
Go to effects and add a gradient Glow, Change the color to black and hit ok
Open bracelet 2 and resize to your liking
Copy and paste as new layer
Move to the top
Open your emo bear and resize down to liking
Copy and paste as new layer place to the right to where it is sitting on the Black Gradient Glow
Open your splatter resize to your liking and move to the top right below the Bear
Open your shoes copy and paste as new layer, resize to your liking and move below your bear
Add your name copyright and save.
Tuesday, November 1, 2011
Misery - PTU

This Tutorial was written on October 31, 2011 by Sami aka Guilty Pleasures.
It was created using my own imagination and creativity, any similarities is completely
Coincidental.
Kit is Misery by Black Widow Creations, you can purchase at her store Underground Scraps
Tube is a Sky Scraps Facebook Exclusive Freebie…
You can visit her blog @Here
Her store is Scraps and the City
New Raster layer 650x650
Open frame 3 copy and paste as new layer
Open paper 19 copy and paste as new layer
Move below all other layers
Highlight your paper layer and erase what is on the outside of the frame layer
Open your tube layer
Place the face in the frame
Grab your eraser and erase what is on the outside of the frame layer
Add a luminance legacy
Open your dead tree copy and paste as new layer
Move below tube layer and grab the eraser and remove what is sticking out from the frame
Open your Smoke copy and paste as new layer, Move below frame layer
Grab your eraser and remove what is on the outside of the frame
Grab your Tube and copy and paste as new layer
Resize down by 80% twice , Copy and paste as new layer
Move to the center of the frame layer
Duplicate frame and move above tube layer
Grab the eraser and erase the legs that is below the frame
Now highlight the frame and erase the frame that is above the tube.
Open Glitter Splat 3 and 4
Copy Glitter Splat 3 and paste as new layer Place to the left below all other laters
Duplicate and Mirror
Repeat with Glitter Splat 4 only at the bottom of the frame
Open Flower 1 Copy and paste as new layer
Resize down to your liking and place at the bottom of the frame above all other layers
Scatter around the bottom of the frame
Add your name copyright save and your complete..
Subscribe to:
Comments (Atom)
My Blinkie ☆
